A disarming notification can notify users if the system has not been disarmed by a certain time. Follow the steps below to create a disarming supervision notification from the subscriber portal.
Create or Edit a Disarming Notification in Your Subscriber Portal
Share or Print This Article
Solution
1
Go to My Account, enter your User ID and Password, and then click Sign In.
Note: If you do not remember your User ID or Password, or experience an issue signing in, see Recover Your Cox User ID or Reset Your Cox Password.
2
From the Administrative Tools and Service Management section, click the Security icon.
![]()
3
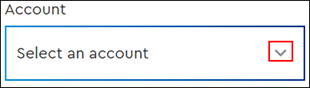
Do you have more than one account?
- If no, then continue to the next step.
- If yes, then from the Select an account drop-down menu, select the account to modify.
4
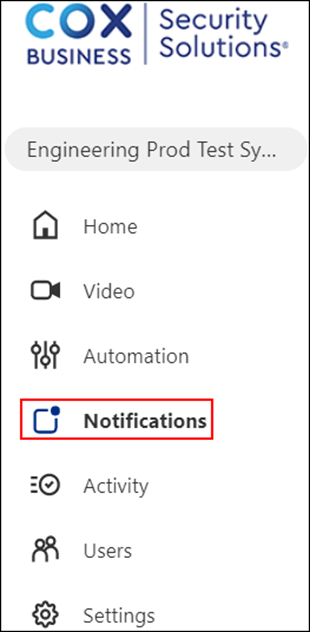
From the left-hand menu of the subscriber portal home page, click Notifications.
5
From the Notifications page, click +NEW NOTIFICATION.

6
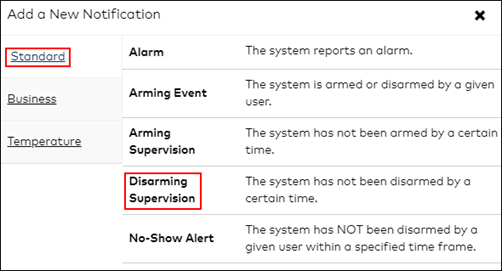
From the Add a New Notification section, click the Standard tab then click the Disarming Supervision option.
7
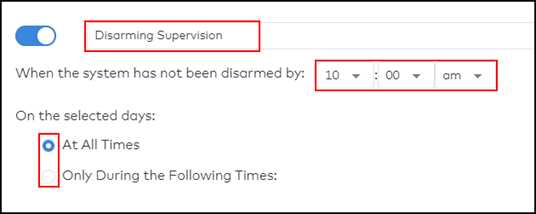
From the Notification page, enter the following information.
- In the Disarming Supervision field, enter the name for the new notification.
- From When the system has not been disarmed by, select the non-disarm timeframe to trigger the notification.
- Under On the selected days, select one of the following notification schedules.
- At All Times: Select to send notifications on all days and times.
- Only During the Following Times: Select to choose the day and time to send the event notification.
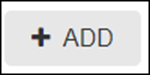
8
Click +ADD to include additional notification recipients.
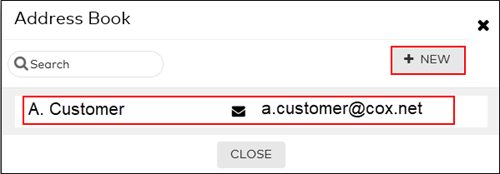
9
Click the entries in the Address Book that are to be notified, or click +NEW to create a new Address Book entry.
10
Verify the notification is configured with the correct settings and click Save.

Cox Business MyAccount Updates
Cox Business MyAccount Updates
With the new and improved MyAccount portal from Cox Business, you’re in control. Included with your Cox Business services, it’s all right at your fingertips anytime, anywhere.
- Perform a health check on your services and reset your equipment
- Easily configure key features and settings like voicemail and call forwarding
- View your balance and schedule payments
Search Cox Business Support
Search Cox Business Support
Didn't Find What You Were Looking For? Search Here.