Use the following steps to complete an ID Scan.
Note: The ID Scan process must be completed using a mobile phone with a US number or a tablet.
Completing an ID Scan
Share or Print This Article
Solution
1
From your device, tap the ID Scan verification link received via text or email to display a greeting message.
2
Tap the Let's get started button.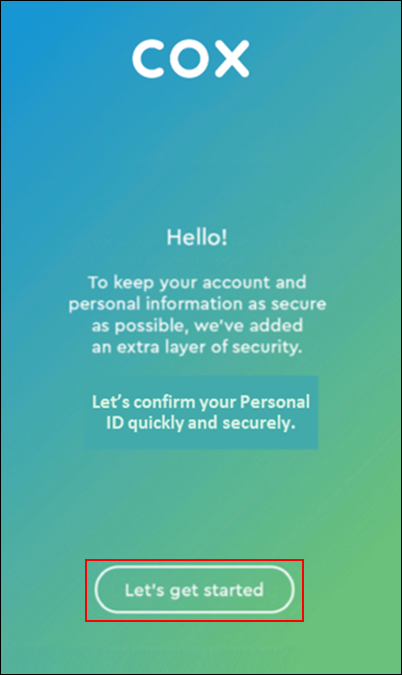
3
Tap the Terms & Conditions checkbox and then tap Yes, continue.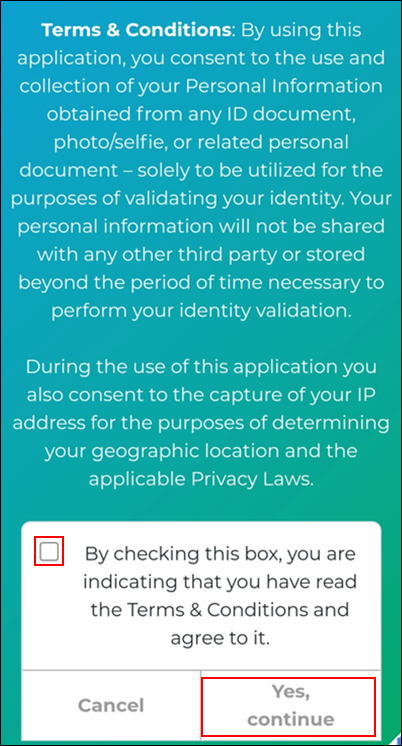
4
From the Here's how it works screen, tap the Go button.
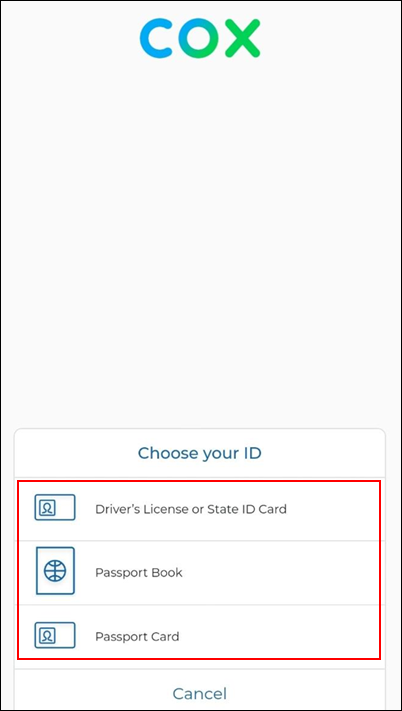
5
From the Choose your ID screen, tap one of the following ID types to upload.
Note: Only a MyAccount profile owner or administrator's ID can be used.
- Driver's License or State ID Card
- Passport Book
- Passport Card
6
From the Capture ID screen, tap the Got it button. Follow the on-screen prompts to take a picture of the front and back of the ID and a picture of yourself, also known as a selfie, using your device's camera.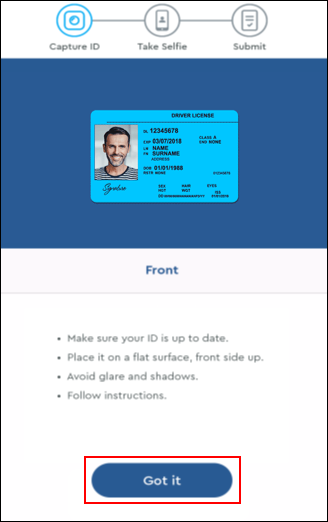
Note: You may be prompted to retake a picture to get a clear and complete image.
7
Tap Next to upload the images.
Result:
- If the upload is not successful, then repeat steps 6 and 7.
Note: If the upload is not completed successfully after three attempts, then the ID Scan will fail. Ask another profile owner / admin to reset any impacted user passwords or wait 24 hours to attempt the process again. All steps complete. - If the upload is successful, then the You're all set! screen displays. Continue to the next step.
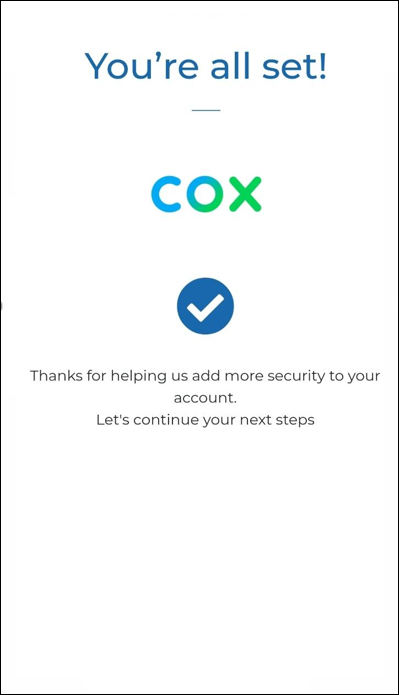
8
Complete the following steps.
- Close out of the You're all set! screen to display the check your text messages / email screen.
- Tap the I'm finished button to display the Create password screen.
9
Complete the following steps to finish resetting the user's password.
- In the New Password field, enter a new password.
- In the Confirm Password field, enter the new password a second time.
- Click the Save changes button.
Result: The ID Scan process is complete and the user's password is successfully updated.

Cox Business MyAccount Updates
Cox Business MyAccount Updates
With the new and improved MyAccount portal from Cox Business, you’re in control. Included with your Cox Business services, it’s all right at your fingertips anytime, anywhere.
- Perform a health check on your services and reset your equipment
- Easily configure key features and settings like voicemail and call forwarding
- View your balance and schedule payments
Search Cox Business Support
Search Cox Business Support
Didn't Find What You Were Looking For? Search Here.