Follow the steps below to save your recorded video captured on your surveillance cameras.
Downloading Video in the Surveillance Application
Share or Print This Article
Solution
1
Access the Home page in the Surveillance application.
2
Search the footage for the date and time you would like to save.
- Click the calendar icon in the bottom right corner of the window to display the calendar.
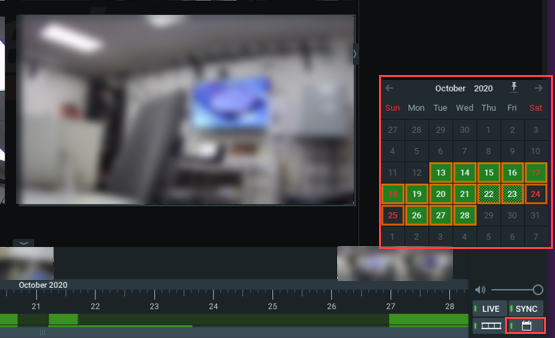
- Select a day of the month.
Note: Green selections indicate a video is available. - Select a time for the starting point.
Result: The time stream displays for the selected date and the video begins to play.
3
Using your mouse, hover the cursor over the time stream bar and zoom in and out to find the selected timeframe.
Note: The green sections indicate a video is available for that timeframe.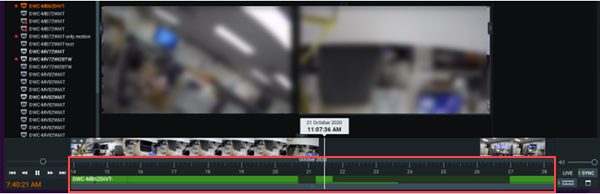
- Select the camera that contains the video footage you want to save. The selected camera name is highlighted on the camera list located in the left-hand column.
Note: Camera views displaying NO DATA indicate cameras that do not have recorded video footage during that selected timeframe. - Click the play, rewind, and fast forward icons to move to locate footage.
4
Complete the following steps to select the specific timeline you want to record.
- Right click on the time stream bar.
Result: The Context Menu displays. - Select Mark Selection Start.
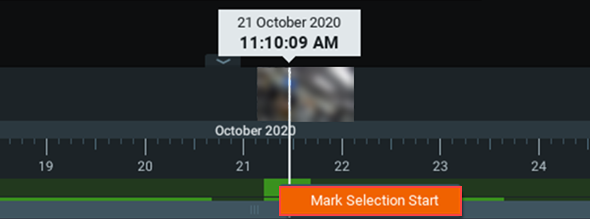
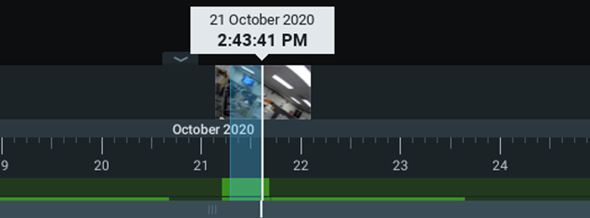
- Click and drag the timeline to the end of the section that you want to record. The time span that you want to save is highlighted.
5
Right click the time span selection to display the drop-down menu.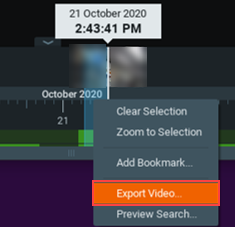
6
Click Export Video to display the Export Video As window.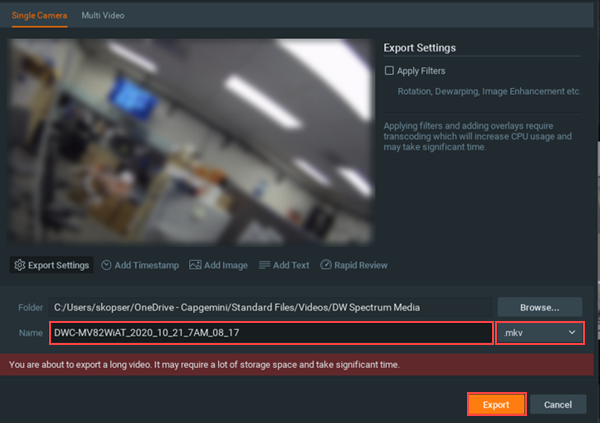
- Enter the File Name and select File Type in the dropdown.
- Click Export.
Note: Depending on the size of the file, the time that it takes to save the file and space on the hard drive may be impacted.

Cox Business MyAccount Updates
Cox Business MyAccount Updates
With the new and improved MyAccount portal from Cox Business, you’re in control. Included with your Cox Business services, it’s all right at your fingertips anytime, anywhere.
- Perform a health check on your services and reset your equipment
- Easily configure key features and settings like voicemail and call forwarding
- View your balance and schedule payments
Search Cox Business Support
Search Cox Business Support
Didn't Find What You Were Looking For? Search Here.